Email Setup
Run niftycli init to configure niftycli. It walks through two parts: your
outgoing SMTP email account, and your first Nifty project.
SMTP setup
niftycli init
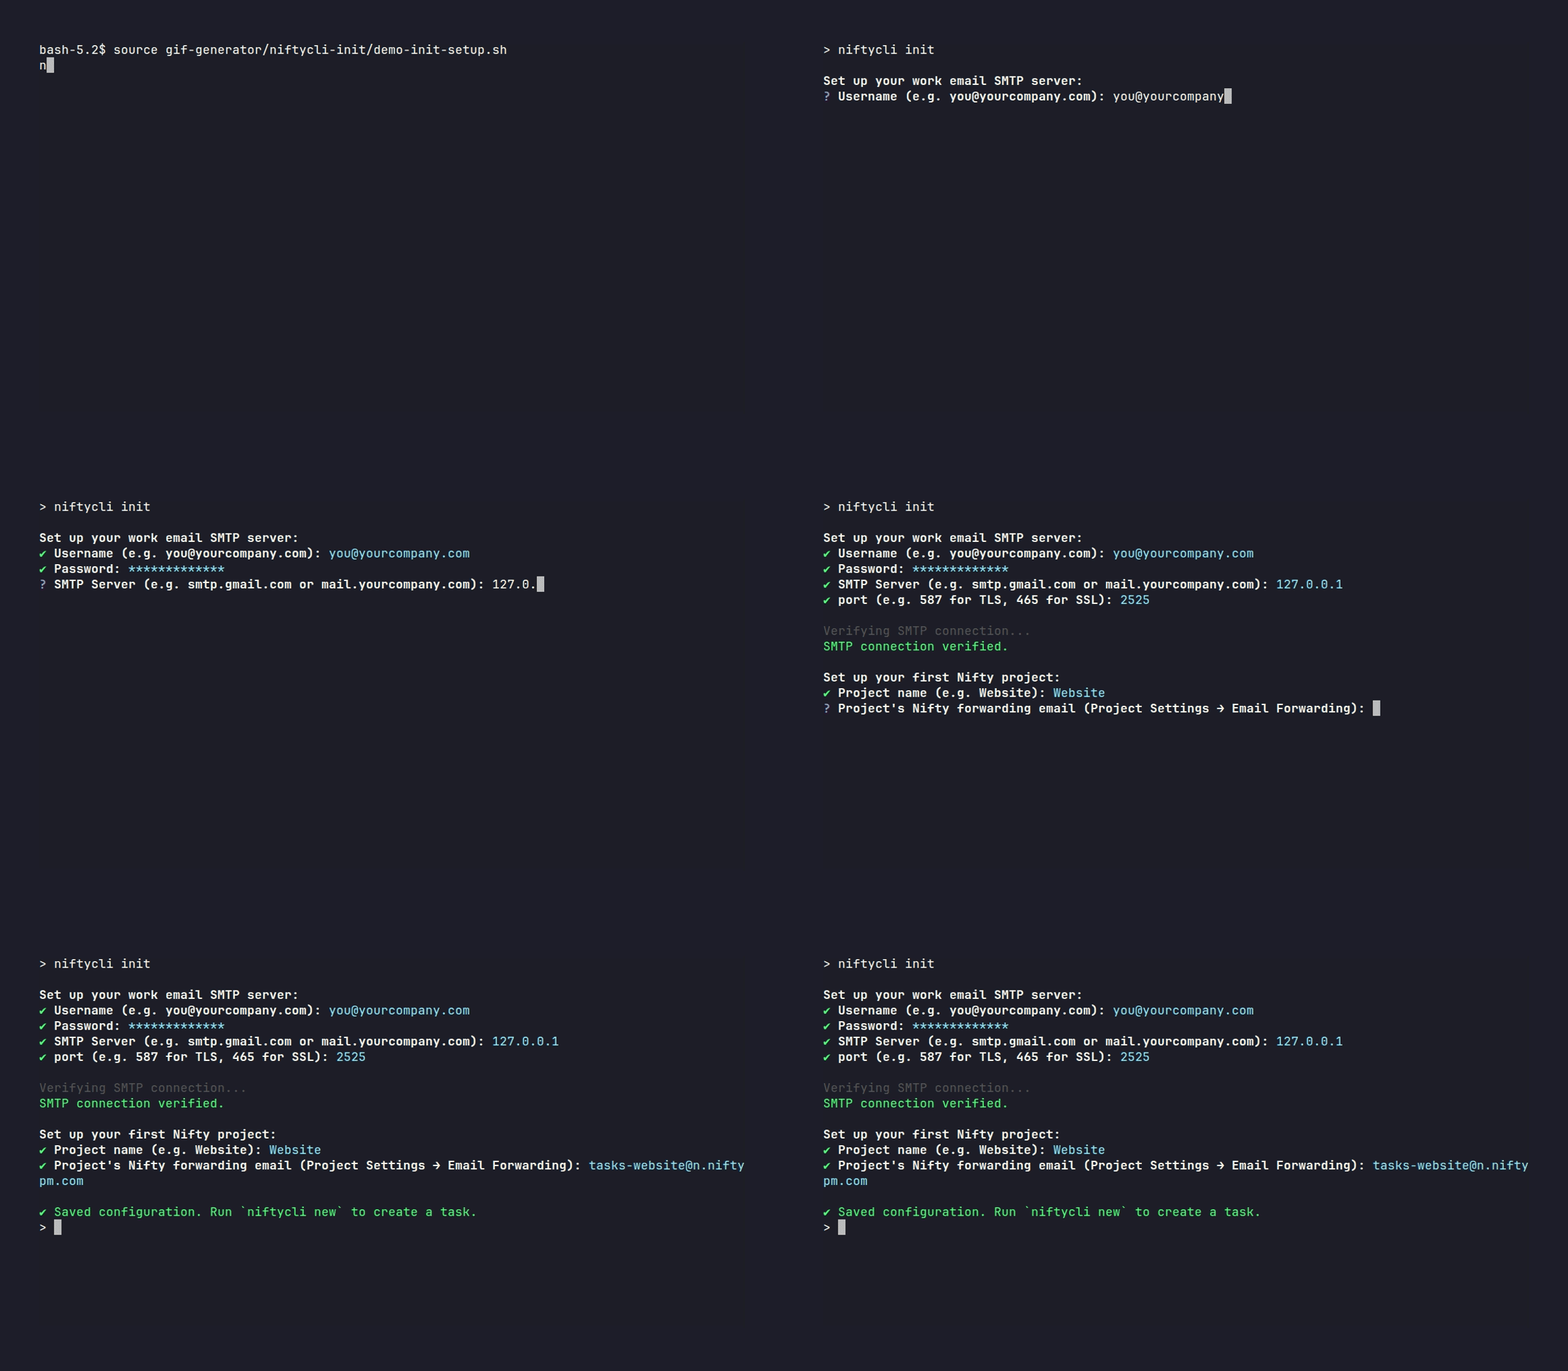
You'll be prompted for:
| Prompt | Notes |
|---|---|
Username (e.g. you@yourcompany.com) | Your email address |
| Password | Input is masked |
SMTP Server (e.g. smtp.gmail.com) | Your provider's outgoing mail server |
Port (e.g. 587 for TLS, 465 for SSL) | Defaults to 587 |
niftycli then verifies the SMTP connection. If it fails, you can still choose
to save the configuration anyway and fix it later by re-running niftycli init.
Gmail and Microsoft 365 usually require an "app password" rather than your normal account password — see Troubleshooting if the connection fails.
First project setup
Next you'll be asked for a project name and that project's Nifty forwarding email address.
Finding your project's forwarding email
-
Open your Nifty project, click the
...menu next to the project name in the sidebar, and select Project Control Center.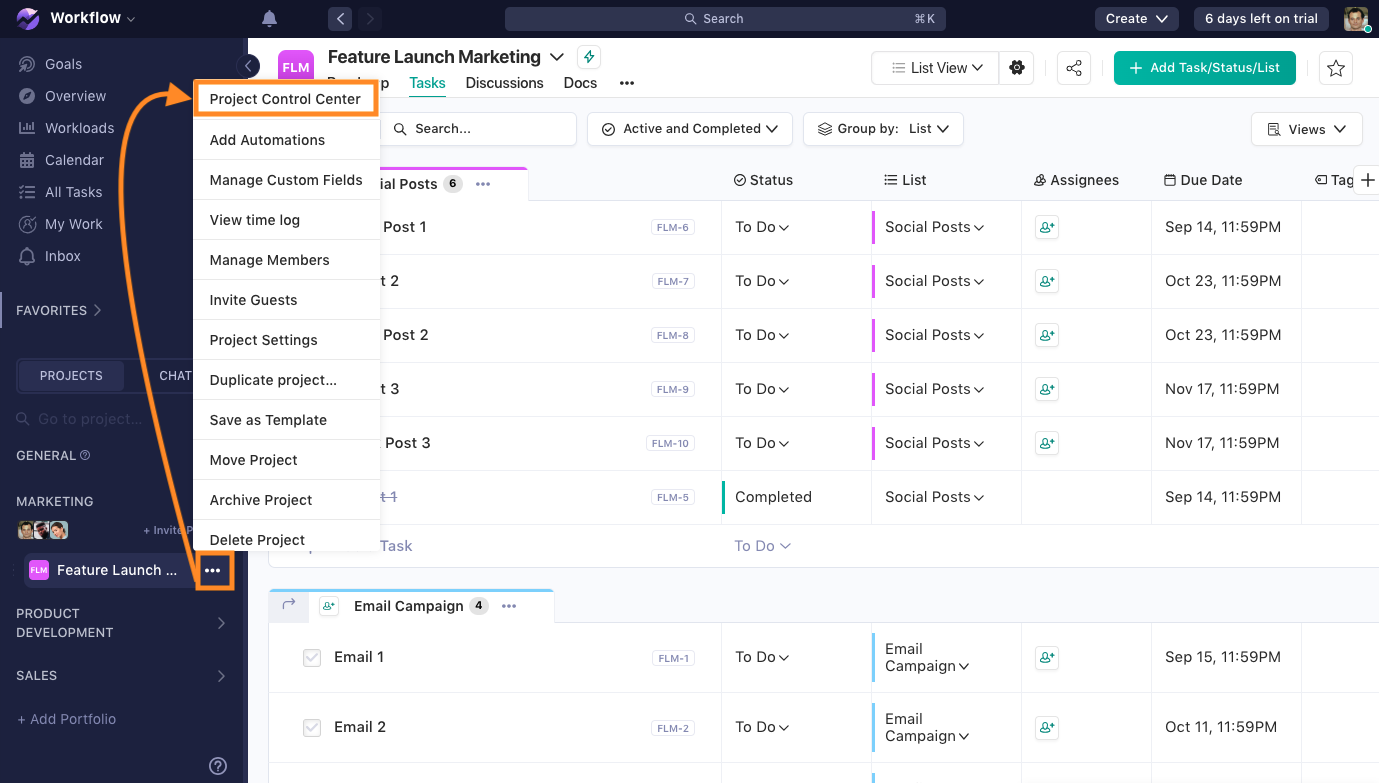
-
In the Automations section, click Email Forwarding and copy the address shown - this is the email you'll give
niftyclifor this project.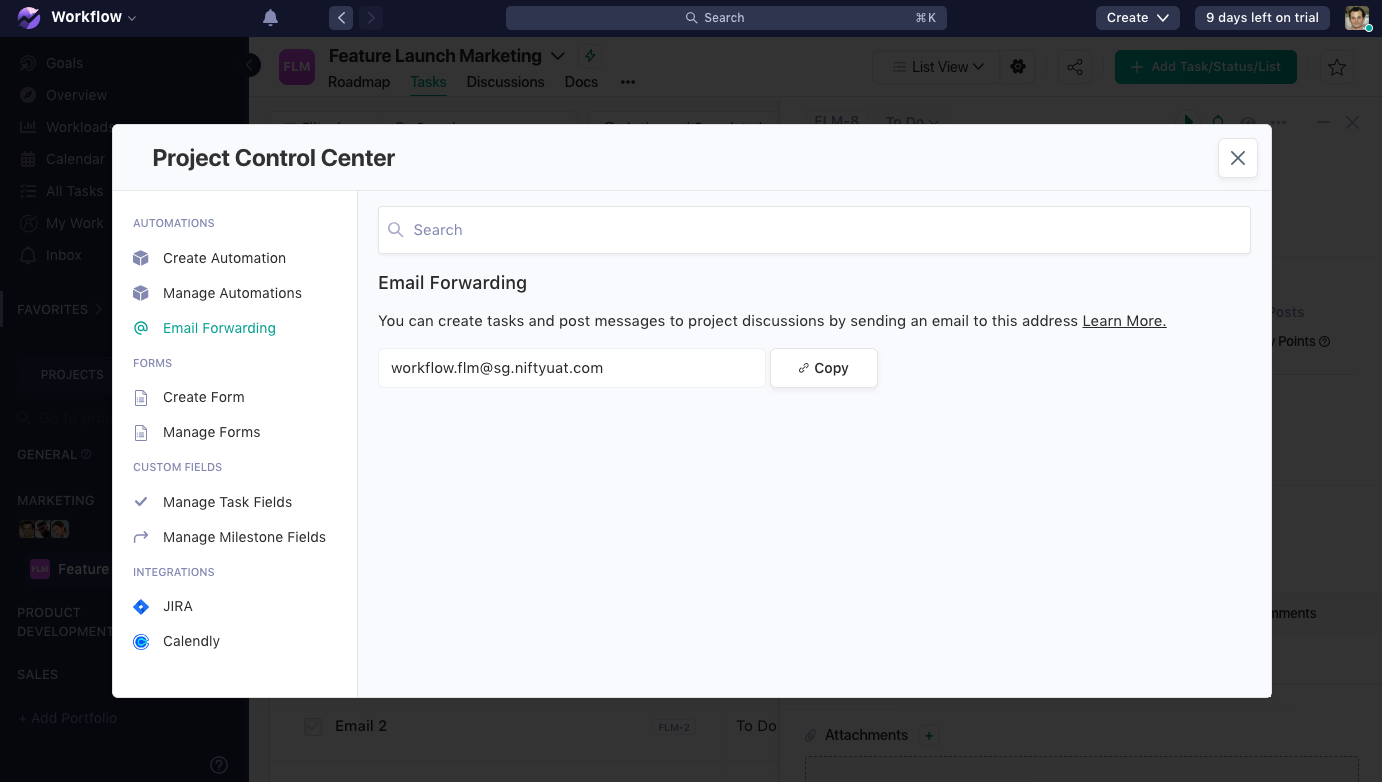
Once saved, run niftycli new to create your first task. Need more projects
later? See Project Management.